Read a Shear Spec Sheet Line by Line
What each field states, what it leaves open and which ones should decide the choice.
By JapanShears EditorialUpdated
On this page
- What is on a spec sheet, and in what order should you read it?
- How should you read length lines?
- What do the hand and handle lines commit to?
- What does the edge line add?
- How should you treat steel and hardness?
- What about thinner lines: tooth count and cut ratio?
- How do you read a set?
- When a spec sheet is enough, and when to ask
- Common mistakes
- Questions people ask
- Further reading
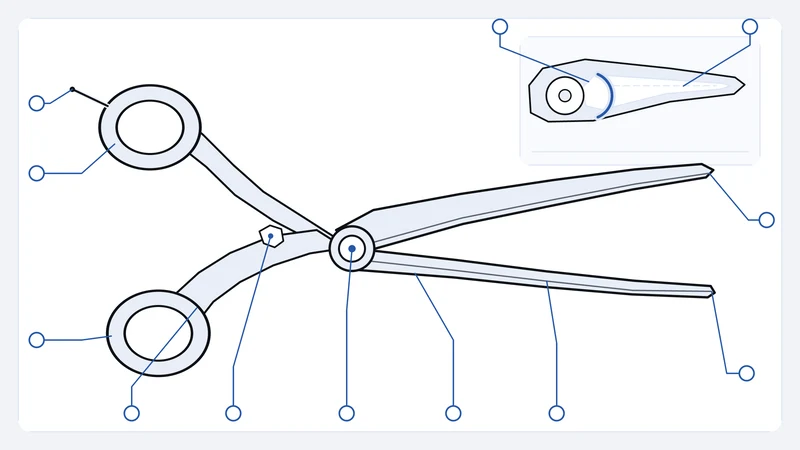
Short answer. Read a spec sheet as a list of separate statements, each of which can be present, absent or true of a different model than the one you selected. Settle hand, nominal size, handle and edge first; treat steel, hardness and finish as supporting lines; and treat any blank as a question for the seller.
Key takeaways
- Each field answers one question. No field answers “is this a good shear?”.
- Nominal size is a label. Blade length is a separate measurement, where the maker gives one.
- A hardness figure is a number with a context, not a score.
- For a set, every field applies to a particular tool in the set, so read each tool on its own line.
- A field the maker does not state is “not stated”, which is different from “absent” or “poor”.
What is on a spec sheet, and in what order should you read it?
A spec sheet is the maker’s or seller’s list of stated facts about one model. Read it in the order your decision depends on, not the order the page prints it. The table below is that order, with what each field commits the maker to and what it leaves open.
| Order | Field | What it states | What it leaves open |
|---|---|---|---|
| 1 | Cutting hand | Right or left build | Whether the handle fits you; see true left-handed builds |
| 2 | Tool role | Cutter, thinner or both | Tooth pattern, for a thinner |
| 3 | Nominal size | The maker’s size label, usually inches | Blade length, reach, weight |
| 4 | Handle type | Opposing, offset, crane or swivel | Ring size and contour; see handle types |
| 5 | Edge | Convex, bevel, serrated and so on | Inside-face treatment; see edge geometry |
| 6 | Steel | A grade, trade name or maker’s alloy name | Heat treatment, finish; see steel names |
| 7 | Hardness | A figure on a stated scale, if given | Edge life, toughness, finishing quality |
| 8 | Finish | Polish, matte, coating or colour | The material underneath; see finishes and coatings |
| 9 | Contents | Which tools and accessories are in the price | Whether each accessory suits your tool |
How should you read length lines?
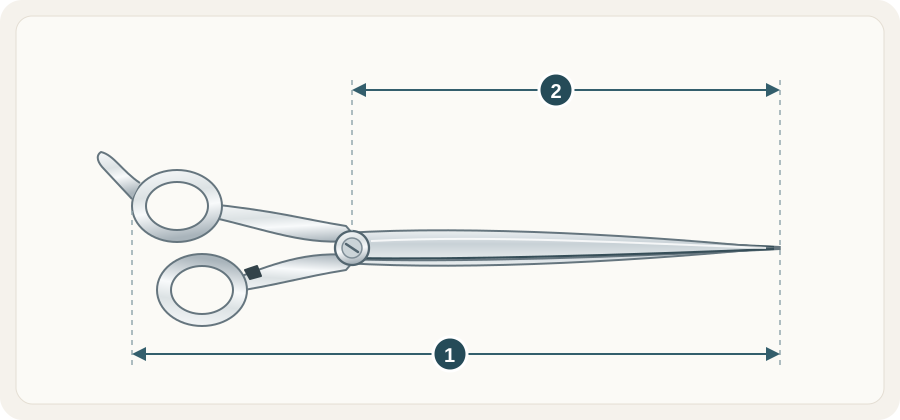
Treat nominal size, full length and blade length as three separate numbers. The inch label identifies the model; it is not a ruler measurement of the blade. A maker’s full length in millimetres and a blade length in millimetres, where both appear, are separate measurements of the same tool.
 Open illustration at full size
- Overall tool lengthCompare the maker’s stated whole-tool size. Finger-rest treatment can vary.
- Blade lengthA separate blade measurement. Check the model specification rather than converting its nominal inch label.
Conventions differ. Joewell’s specification list says its size treats a removable finger rest differently from a permanent one, so a ruler measurement of a finished shear may not match the label. Our size guide shows a worked example with maker-published figures. For choosing a reach, start from a shear you already know, then read blade length by task.
What do the hand and handle lines commit to?
The hand line states for which hand the blades are built. It is a construction fact: a right-handed tool held in the left hand is still a right-handed tool, whatever the rings look like. The handle line names a ring arrangement. It tells you where the thumb ring sits relative to the finger ring, and nothing about ring diameter or contour.
If a left-hand option exists on a listing, check that the selected option names it. A family photograph may show a mirrored or flipped view. The left-handed checklist covers what to confirm.
What does the edge line add?
The edge line states a construction word such as convex, bevelled or micro-serrated. It is one of the lines most likely to change with size inside a single model family, so read it against the size you selected rather than the family title. The edge comparison sets the words out.
How should you treat steel and hardness?
Steel gives a material name; hardness gives a number. Neither one tells you how the finished shear cuts. A hardness figure belongs to a stated scale and, ideally, a stated measurement method. Hardness is a property of a material state, not a score for sharpness, comfort or value, and a catalogue figure is the maker’s statement rather than something we measured.
Where a model states no hardness, leave the field blank in your notes. Do not borrow a range from another model or from the grade name. If the figure is the thing that would change your choice, ask for it for the exact model.
What about thinner lines: tooth count and cut ratio?
For a thinner, add two lines: tooth count and the maker’s cut ratio, where one is published. Tooth count is a number of teeth; the cut ratio is the maker’s approximate figure for what a closure removes under its own conditions. They do not substitute for each other, because tooth width, spacing and shape also matter. The cut-ratio guide and the same-count comparison show why.
How do you read a set?
A set line names more than one tool, and every other line may apply to only one of them. Read a separate column for the cutter and the thinner, including hand, size and edge or tooth description. A set price covers its written contents; a size button on a set can change the cutter and leave the thinner fixed.
When a spec sheet is enough, and when to ask
A spec sheet is enough when the lines you care about are stated for your selected option and agree with the maker’s page. Ask the seller when a line you need is blank, when two lines appear to contradict each other, or when a photograph shows something the text does not state. Quote the model, selected size and SKU; our listing guide shows an enquiry that works.
Common mistakes
- Reading the family page instead of the selected option. Size, edge and contents can change with the selection.
- Equating the inch label with blade length. They are separate figures.
- Reading hardness as a ranking. A higher number is not a better shear.
- Copying a line from a sibling model. Unstated is unstated.
- Skipping the contents line on a set. Check each tool, and any case or oil, individually.
Questions people ask
Which spec line matters most?
For most buyers, hand, then nominal size, then handle, then edge. Material lines are tiebreakers once those four fit.
Is a longer blade always better?
No. Blade length is a reach and control decision tied to the work. See blade length by task.
Why does a model have no hardness figure?
Many makers do not publish one for every model. A missing figure is not a flaw. If it matters to you, ask the maker or seller.
Can I compare two spec sheets directly?
Yes, line by line, if both state the same fields. The fair comparison method shows how to handle gaps.
Further reading
- How to read a hair scissor listing, the worked-example companion to this page, and the knowledge base.
- The 20-term glossary for unfamiliar fields.
- Joewell’s product specification table, an example of a maker stating its measuring convention.
- Scissorpedia and scissorlab.co.jp, a Japanese scissor website.
Scissorpedia is a fellow member of the ShearAlliance (see ShearAlliance).