Left-Handed Cutting Problems and What to Check First
Match the symptom to the likely cause, then check in order before you change anything.
By JapanShears EditorialUpdated
On this page
- Why do left-handed cutters meet problems that others do not?
- Which symptom points to which cause?
- What order should you check things in?
- When should you stop and hand the shear over?
- What does a fix look like for each cause?
- Worked example: reading the hand on a listing
- Common mistakes
- Questions people ask
- Further reading
Short answer. Left-handed cutting problems usually come from one of five places: a shear that is not truly left-handed, ring fit, tension, an edge or alignment fault, or technique learned from right-handed demonstrations. Several of these look alike on the hair, so check them in that order, change one thing at a time, and stop using the shear on clients if it has been dropped or the edge is damaged.
Key takeaways
- Confirm the cutting hand of every tool first. A right-handed shear held in the left hand is still mechanically right-handed.
- Folding, pushing and uneven lines have several look-alike causes, and tightening the screw is not a cure for most of them.
- Fit (ring size, thumb position, handle family) is a separate question from cutting hand.
- Adapting to a true left-handed build takes some time and is not a sign that the tool or you are at fault.
- A drop, a nick or a loose screw is a job for a qualified professional, not a home fix.
Why do left-handed cutters meet problems that others do not?
Because the blade arrangement is built for one hand. A true left-handed shear mirrors the blades, the way they cross at the pivot and the handle together, and the crossing orientation affects two things you notice at the chair: how much of the cutting line you can see, and how much side pressure it takes to keep the edges working together. A right-handed pair used in the left hand keeps its original construction, however symmetrical the rings look.
Many left-handed cutters also learned on right-handed tools, or watched demonstrations given right-handed. That adds a second, separate source of friction: the movement you were shown may need describing from the left. Our left- and right-handed guide explains the mechanics, and the five-point handedness check covers the listing side.
Which symptom points to which cause?
Use the table to find where to look first. These are common patterns, not diagnoses, and the first column describes what you see rather than what is wrong.
| What you notice | Possible causes, in the order to check | First check |
|---|---|---|
| Hair folds or is pushed ahead of the blades | Shear is not left-handed; tension; residue at the pivot; edge wear or alignment | Confirm the hand, then the maker’s tension method |
| You cannot see the cutting line | Blade crossing is for the other hand; hold and head position | Confirm the hand; compare one named left-handed candidate |
| You squeeze the blades sideways or grip hard to keep them cutting | Shear is not left-handed; tension too slack; ring too loose; alignment | Confirm the hand, then ring fit |
| A ragged line, worse toward the tips | Edge damage, alignment, tension, technique | Ask whether anything happened first, such as a drop |
| A new left-handed pair feels wrong | Adaptation; a different handle family or length from your old pair | Change one variable at a time |
| The thinner behaves differently from the cutter | Only one tool in the set is left-handed | Read the hand on each tool’s own option |
| The setting will not hold | Normal drift, a loose screw, worn washers | Model-appropriate tension check; service if it keeps moving |
Where along the blade the problem appears is worth noting, because it helps whoever assesses the shear.
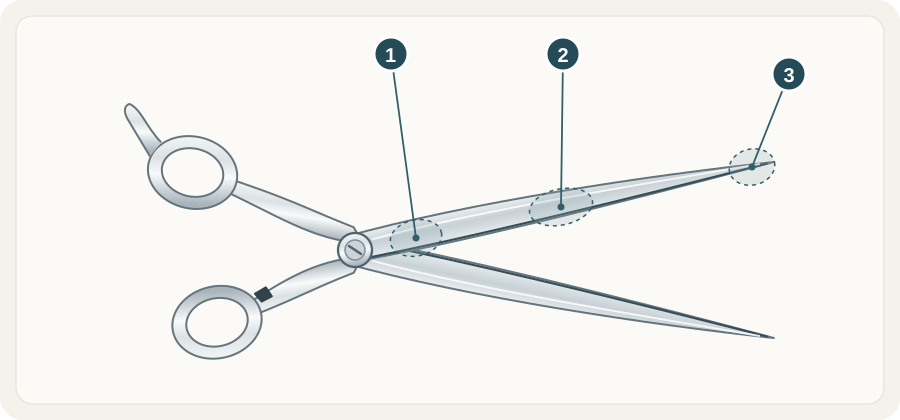 Open illustration at full size
- HeelThe part of the cutting blade nearest the pivot.
- MiddleThe central span of the cutting blade.
- TipThe end of the blade. Note catching or folding here separately from the rest of the cut.
A fold at the tip and a fold at the heel can have different causes. The location alone does not settle which.
What order should you check things in?
Work through these in sequence. Each step removes a cause before you move to the next.
- The hand of every tool. Open the exact option you ordered or own and read the stated hand. In a set, check the cutter and the thinner separately.
- Fit. A ring that is too loose can encourage a tight grip, and one that is too tight restricts movement. A compatible insert changes the ring opening only; see finger rings, inserts and shear fit. Handle family is a separate choice again.
- Clean, dry, then tension. Remove hair and residue, dry the shear, oil as the maker directs, and check tension using your maker’s method for your exact model. There is no universal turn count or release angle. The screw and tension guide explains why.
- History. Has the shear been dropped, knocked or soaked in a chemical, or has the screw been adjusted recently? Any of these can change how it cuts.
- Technique. Ask your educator or a senior colleague to describe the movement for your cutting hand and watch you. A tool cannot replace that conversation.
Stop after step 4 if the history points to damage. Cutting paper to test a shear is not a reliable check and may be unsuitable for the model; use the maker’s approved method instead.
When should you stop and hand the shear over?
Stop using the shear on clients and arrange a qualified professional’s assessment if:
- it has been dropped, or you can see or feel a nick;
- the screw is loose and will not hold a setting;
- the blades catch, scrape or feel gritty after cleaning and oiling;
- the action changed after contact with a chemical.
Do not run a fingertip along the edge to check it. Our ten signs your shears need attention lists the symptoms in more detail.
What does a fix look like for each cause?
- Not a left-handed build: move to a genuine left-handed option and give yourself a supported trial. A true left-handed pair can feel different from the tool you trained on, so judge it over more than one cut and with your educator’s help.
- Fit: try a compatible insert, or a different handle family, but change only one of them per trial.
- Tension: adjust only in the maker’s increments and only with the adjuster the maker names.
- Edge or alignment: a professional job. Brief them with what you noticed, where on the blade, and anything that happened beforehand.
- Technique: a teaching conversation, not a purchase.
If a handle or working posture keeps feeling wrong over time, treat that as a question for a qualified professional about your working conditions. A specification cannot settle it, and we make no outcome claims for any handle.
Worked example: reading the hand on a listing
The Ichiro Rose Lefty cutter states its hand, length and handle on the selected option. That is the pattern to look for, and it is the evidence that matters more than a photograph.
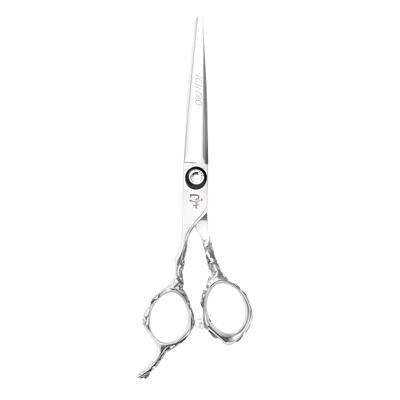
For a wider shortlist of left-handed cutters, see the left-handed cutter guide or the left-handed collection.
Common mistakes
- Tightening the screw until the hair stops folding. It can add wear without fixing the cause.
- Treating a reversible finger rest or symmetrical rings as proof of a left-handed build. They are not.
- Buying a left-handed cutter and keeping a right-handed thinner. Each tool has its own hand.
- Changing hand, handle family and length in one purchase. You will not know what you are reacting to.
- Judging a new pair on the first few cuts. Give it a supported trial.
- Testing an edge with a fingertip or on paper. Neither is a safe or reliable check.
Questions people ask
Can I make a right-handed shear work for my left hand?
You can hold it, but it remains mechanically right-handed. Swapping or flipping a finger rest changes where one finger sits, not the blade arrangement.
How do I know whether the problem is the shear or me?
Check the cutting hand and the maker’s tension method first, then ask whether anything happened to the shear. If it still behaves oddly, have it assessed. If it is sound, technique and fit are the next conversation.
Do left-handed shears need different care?
Care follows the maker’s directions for your exact model, as for any shear. Handedness does not change the cleaning, drying or oiling routine in the maker’s care notes.
How long does it take to adjust to a left-handed pair?
It varies from person to person, and we cannot give a figure. Compare one named candidate and take it to your educator rather than switching everything at once.
We sell shears and have not run cutting tests, so this page describes what to check, not what a given pair will do for you. Reviewed 4 November 2026.
Further reading
- The knowledge base for related guides, including cutting-hand terms in the glossary.
- Joewell’s left-handed model reference as an example of a maker naming a left-hand line.
- Scissorpedia for general scissor reference.
Scissorpedia is a fellow member of the ShearAlliance (see ShearAlliance).