JapanShears Editorial · Published
10 Shear Care Habits for Every Working Day
Ten shear care habits arranged by when you do them: between clients, at the end of the day, once a week and whenever something changes.
On this page
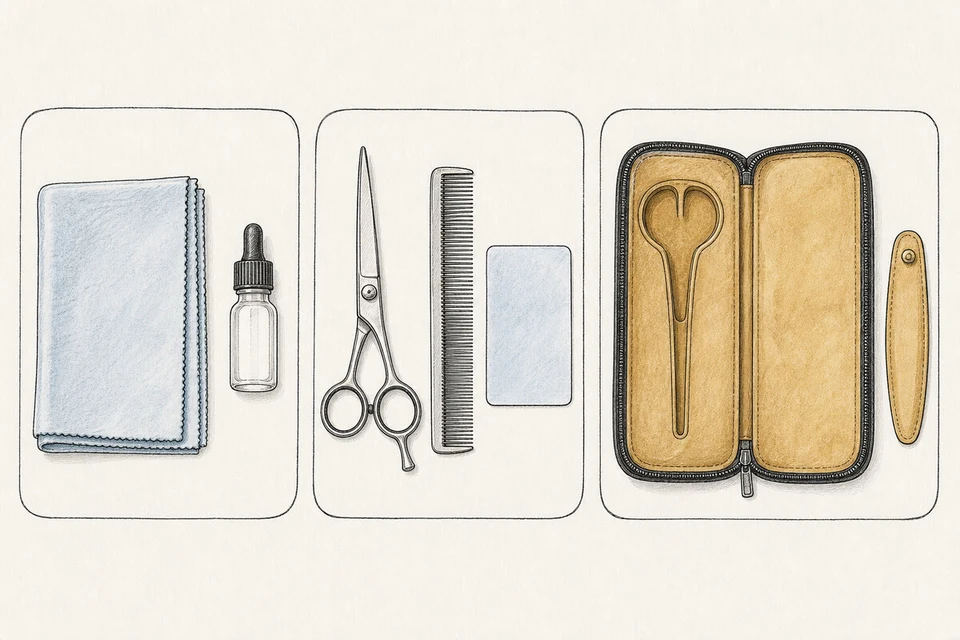
Shear care works best as a rhythm rather than a ritual: a few seconds between clients, a minute at the end of the day, a closer look once a week and a note whenever something changes. Arranged by when you do them, ten habits cover the whole routine.
Short answer. Between clients, clear loose hair and put the shear down closed. At the end of the day, clean it following your workplace procedure, dry it fully and store it covered. Once a week, look over the pivot and tips, and oil or adjust only as the model’s own instructions describe.
How this list was chosen
This list organises routine care by timing, using general trade practice and the care notes that accompany shear models. It does not replace the instructions for your model or your workplace’s hygiene procedure, and we did not test any product or method. Reviewed 4 November 2026. The care routine guide sets out the same habits in table form; this page puts them in the order you would do them.
Between clients
1. Clear loose hair
Brush or wipe loose hair from the blades and handles with a soft cloth or brush that suits the model. Do it before the hair has time to dry on the surface or work into the pivot. Keep the cloth clean, since a used cloth can carry residue from one surface to another.
2. Check a thinner’s tooth line
On a thinning or texturising shear, look along the teeth for trapped hair or a visible bent tooth. Clear lodged hair gently and avoid forcing another tool between the teeth. If a tooth looks damaged, stop using the thinner and read ten signs your shears need attention.
3. Put it down closed, and not on the edge
Lay the shear on a stable surface or in a holster, closed, with the tips protected. A tool left open on a station edge is easy to knock. The case and holster comparison shows the layouts available.
At the end of the day
4. Complete the cleaning process
Follow your workplace procedure and the method suited to the tool. A visually clean shear is not automatically disinfected, and a wipe that suits one surface may not suit another. Cleaning and disinfection are separate steps; check the label of any product you use and your local requirements.
5. Dry it thoroughly
Dry the blades, the handles and the area around the pivot. Moisture trapped near the pivot is easy to prevent and awkward to deal with later. Do not put a damp shear into a closed case.
6. Store each shear on its own
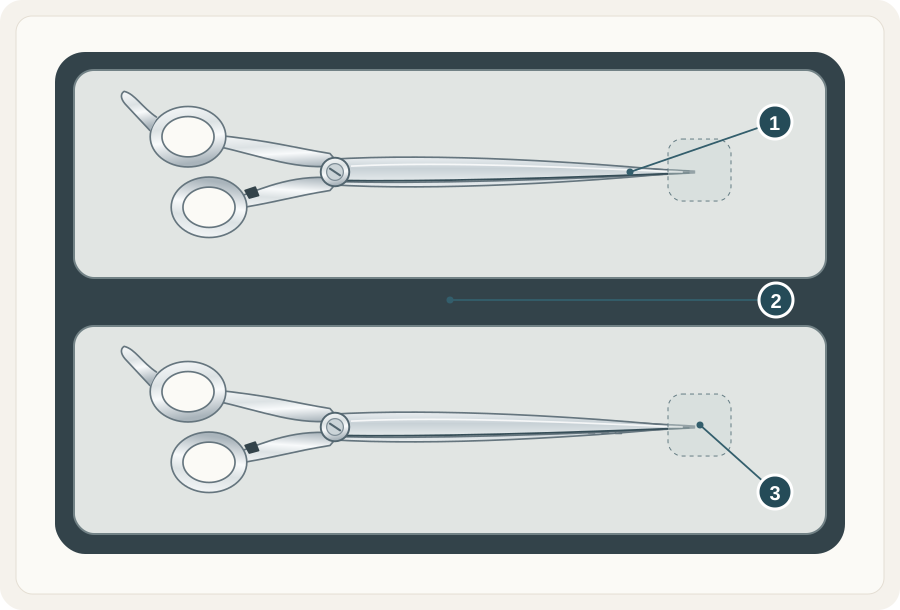
Return it to a case, sleeve or holster where the tips are covered and nothing else rests against the edges. Separate storage for each tool, including both halves of a set, keeps the edges from touching other metal. The diagram shows the principle.
 Open illustration at full size
- Close the toolClose gently before carrying or storing it.
- Separate the toolsKeep cutting edges and tooth blades from meeting another shear or loose accessory.
- Protect the tipsPrevent the tool from sliding or being knocked in storage and transit.
Once a week
7. Look it over in good light
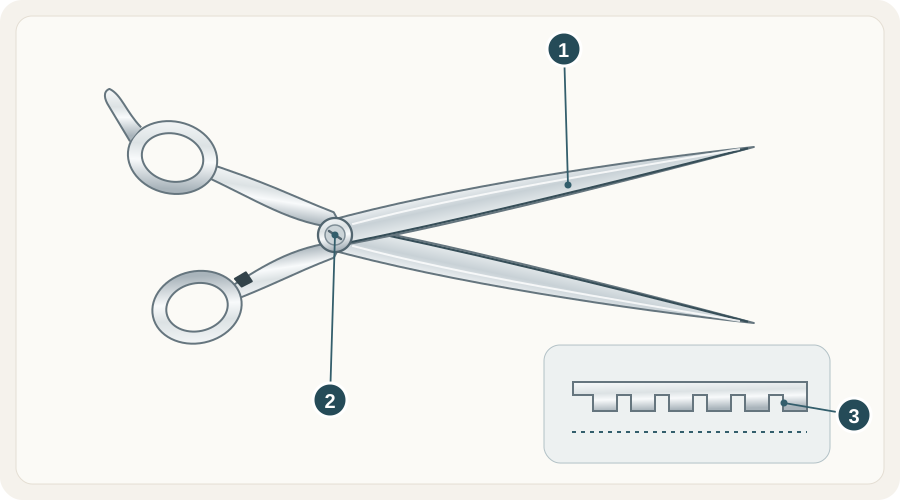
Hold the shear by its handles and look at the tips, the cutting lines and the pivot area. You are looking for a visible nick, a bend, a loose part or residue, not testing the edge with a finger. Ten seconds is enough to catch most visible changes.
 Open illustration at full size
- Blade surfacesLook for loose hair, product residue and moisture without touching the cutting edge.
- PivotCheck the visible joint and how the action feels. Follow the exact model instructions before oiling or adjusting it.
- Thinner teethClear loose hair carefully. Never force a cloth, brush or tool between closed teeth.
8. Oil and adjust only as instructed
Pivot systems differ by model, and so do the oil, if any, and the method of adjustment. Use the instructions supplied with your shear, and do not tighten the tension in search of a cure for a symptom. If instructions did not arrive with the tool, ask the maker or the seller.
9. Check that your care products suit the model
A care product that arrives in a kit still needs to suit your shear, its finish and its pivot. If you are not sure, ask before you use it. The maintenance basics page and the care guide explain the routine, and care products are in the accessories collection.
Whenever something changes
10. Write down the change
If the action feels different, if the shear has been dropped or if the cut has changed, note the date, the place on the blade and what you did next. A simple maintenance log turns a vague worry into information a technician can use. Then stop using the shear if the cut has changed and arrange service rather than adjusting it repeatedly.
What this routine does not cover
It does not set a sharpening interval, and it does not promise how long an edge will last. Those depend on the model, the work and the hair. It also does not tell you how to disinfect: that follows your workplace procedure and local rules. For wider ownership decisions, such as backups and technicians, see ten ways to make your shears last.
Where to go next
The knowledge base lists every care and service guide, and ten questions before sharpening prepares you for a service conversation.
Questions people ask
Is wiping a shear with a cloth enough to disinfect it? No. Cleaning and disinfection are separate steps. Follow your workplace procedure, local requirements and the label of any product you use.
How tight should the tension be? As the instructions for your model describe. There is no universal “tight enough” feel, and tightening is not a cure for a changed cut.
Further reading
- Scissorpedia, an information website on scissors in general.
- Safe Work Australia, for work health and safety guidance in salons and workplaces.
Scissorpedia is a fellow member of the ShearAlliance; see ShearAlliance.
A closer look at shears
Comparing two models? Send us their names or SKUs and the cutting work you have in mind.
Latest blog posts
Read all blog posts
10 Japanese Shear Myths and What Is Actually True
Ten common beliefs about Japanese shears, from blade length to steel and origin, with a plain correction and a way to check each one.

10 Mistakes to Avoid When Buying Shears Online
Ten online-buying mistakes that cost stylists time and money, from trusting the family photo to skipping the returns terms, with a fix for each.